Raspberry Pi Squeezebox server with 3d printed enclosure
The need for a enclosure
Back in August I created a Squeezebox server using a Raspberry Pi 2 and a USB harddrive I had both lying around. I quickly had the server up and running and I'm using it ever since but I didn't have a enclosure. A 3D printed enclosure would enable me to give the server a more permanent place and at the same time I'm getting rid of these components and cables lying around on my desk.
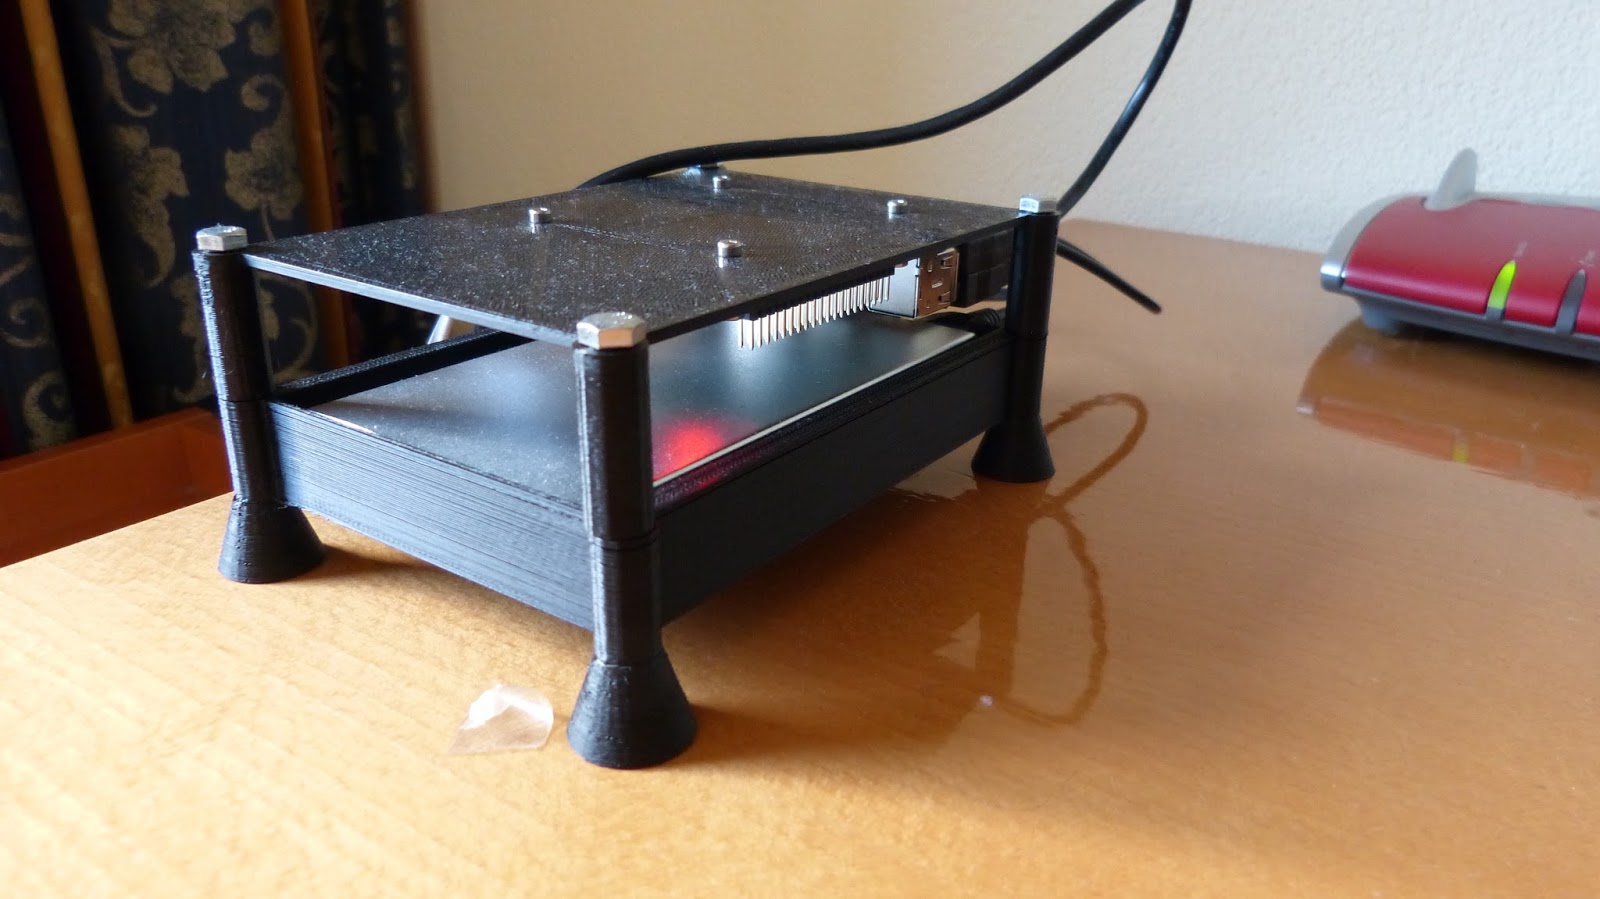
The Squeezebox server sitting nicely into the 3d printed enclosure that I designed for it.
Solvespace for the enclosure
As a 3D CAD tool to design the enclosure I choose Solvespace. Solvespace is free and open source available for Windows, OSX and Linux. I use Solvespace a lot and it has it's limitations but I felt it was fully capable for this job and indeed it didn't disappoint. Before starting I made a couple of simple drawings with pen and paper, I measured the size of the harddisk and the Raspberry Pi. I also used a template for the Raspberry Pi mounting holes that I found online.
With all this information I started drawing with Solvespace. The power of Solvespace (and other 3D CAD programs) is that's it's very easy to make changes to the 3D design. While working on the design I noticed that USB harddisk can become hot so I figured it needed to be cooled. In the drawing I elevated the harddisk a bit by adding four supports one on each corner of the disk and made four ventilation slots in the bottom of the enclosure thus allowed air to flow freely around the harddisk. The Solvespace files of this enclosure are here. Make sure to adjust the size to the USB HDD you're using.
The 3D design I came up. The printed parts, bottom and lid, are grey, the green part is the Raspberry Pi and the red part is the USB harddrive.
3d printing and assembly
I printed all the parts on my Hephestos 2 printer using black PLA filament and the result looks pretty good. Assembly of the parts is simple. First I used 2.5mm bolts and nuts to mount the Raspberry Pi upside down to the lid of the enclosure. Next I insert the USB HDD into the bottom placing it on the elevated supports. The enclosure is fastened with four bolts 5x60mm and 5mm nuts. The nuts fall nicely into the hexagonal cavity of the feet. Finally the USB cable of the HDD is connected with the Raspberry PI and the ethernet cable is connected from my router to the Pi. The server has run for several weeks in the 3d printed enclosure without any problem. For those that want more information I made a YouTube video about this project.
No comments:
Post a Comment
Note: Only a member of this blog may post a comment.

No comments:
Post a Comment
Note: Only a member of this blog may post a comment.